ADDENDUM - 11/23/2019
add the following within the img tag to make the img width appear properly on mobile platforms: class="img-xs-width"
In the img tag it would look like this: <img class="img-xs-width" ... then the rest of the img tag
--- end addendum ----
Aside from being able to add images using a browse button in events and bios, any body text can have an image added to it, or a pdf linked. To add an image, or a pdf, is a two part process. First the file needs to be uploaded to server from your computer. The second part is inserting the image or link.
First, to review, that body text is sometimes called different things in different places. In Biblio the body text is typically going to be in Full Text though the imported articles are mostly in Notes. In bios the body text is called Bio and in events it is called Event Description.
Body text will typically have a wysiwyg editor. Any time you need to edit HTML you need to switch the editor to the Source mode. Here you will not use Source mode. The wysiwyg editor will create html source code for you.
When you want to add an image first click on the image properties button which is the rectangle button which is the first button on the second row of the wysiwyg editor. It is shaped like a rectangle and has green and orange and is left of the button which is a circle with an "f".
After clicking this button a window will open. Click on Browse Server. This will open another larger window. On the left side of this window is navigation for the server's file tree and begins with sites/default/files/. If you are adding an image to a biblio content type it will by definition be video history content and you need to navigate to the history/images folder to start (sites/default/files/history/images but all you see is history/images). Inside history/images folder are several other folders which should be used depending on which section the content resides in. Use groups for groups, people for people-interviews? (it's currently empty so I'm not sure what that is for). People-texts for people-texts, etc. You can look through the folders and see how the files are distributed, this is left over from David's work and I am trying to follow his organization. Select the folder you want the image to end up in and open it, so you now you have a full path in order to save the image. You should see the images already in the folder on the right side of the window.
If the image is already on the server, select the image and then select Insert File. Then go on to the instructions for setting an inserted file below. If the image is not already up on the server and you want to upload one, still in the selected directory, click on Upload (the button on the top left of the window).
Use the browse button to browse your machine for the image to upload. I have not created any thumbnails for this site so so far I have not selected any thumbnail size. Doing so would create an thumbnail as well as upload the image. When the file is selected click on Upload in the rectangle at the bottom left of the browse box. Doing so will upload a copy of the file to the server with the same name as it has on your hard drive. Though you can select the name I don't yet see a way to edit it in this interface so be sure to name it the way you want first.
Once uploaded the name will appear in the list for the selected folder on the right side of the window. Select the newly uploaded file and then click Insert File (the button with the grean check on the top of the window at the far right).
 At this point the larger window will disappear and the selected image will appear in the smaller window that first appeared when you hit the image properties button. Now you can resize the image, changing the width automatically change the height to match unless you turn the lock off. You can also add a border, one pixel is fine, and add padding to the height and width if you like as well as define left, right or center placement of the image. Hit OK when you are done setting the parameters for the image.
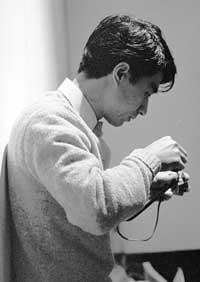
The image at the left is set to align left, has 6 pixels of H padding, and a 1 pixel border. In edit mode, click twice on it to see the settings.
Unfortunately I have found that if you go back and edit the page you might have to set the image parameters again.
Be sure to save your changes for the page when done editing the body text or the changes will be lost.